
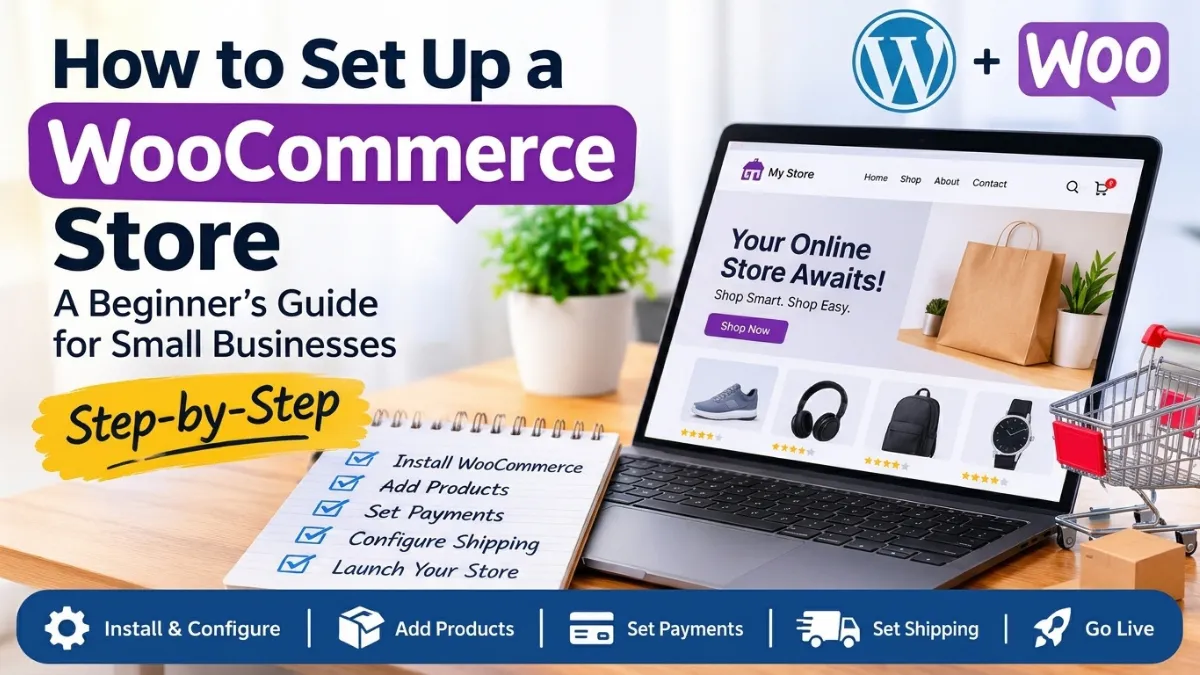
Starting an online store can feel like a big task, especially if you have never built a website before. You need to choose the right tools, add your products, set up payments, and prepare your store for customers.
The good news is that you do not need to build everything from scratch. With WordPress and WooCommerce, you can create an online store and manage it from one place.
Set Up a WooCommerce Store for Small Businesses
WooCommerce is a popular ecommerce plugin for WordPress. It helps you turn a regular WordPress website into an online store where customers can browse products, place orders, and make payments.
In this guide, you will learn how to set up a WooCommerce store step by step. We will cover the basic setup, products, payments, shipping, taxes, and final checks before launch.
Whether you plan to sell physical products, digital downloads, or a small range of items, this guide will help you understand the process.
What Is WooCommerce?
WooCommerce is a free ecommerce plugin that adds online store features to a WordPress website.
After installing it, you can add products, manage orders, set shipping options, and accept payments through supported payment services.
It works with many WordPress themes and plugins. You can also change the design and features of your store as your business grows.
Here are some things you can do with WooCommerce:
- Add physical and digital products.
- Set product prices and stock levels.
- Accept online payments through supported payment methods.
- Manage customer orders.
- Set shipping options and delivery areas.
- Create discount coupons.
- Track sales and store activity.
- Add extra features through extensions.
WooCommerce is a good option for small businesses that want control over their online store. However, you still need to arrange hosting, security, updates, and regular maintenance.
What Do You Need Before Setting Up a WooCommerce Store?
Before installing WooCommerce, prepare a few basic things. This will make the setup process easier and help you avoid delays later.
1. A Domain Name
Your domain name is your store’s web address. Customers use it to visit your website.
Choose a name that is easy to remember and fits your business. If possible, keep it short and avoid confusing spelling.
For example, a store selling handmade home products could use a brand name that reflects its products or business identity.
2. WordPress Hosting
Your website needs hosting to store its files and database. Choose a hosting plan that supports WordPress and can handle your expected store traffic.
Look for these basic features:
- Good server performance.
- SSL support for a secure website.
- Regular backup options.
- Enough storage for your products and images.
- Reliable customer support.
Your hosting choice can affect your store’s speed and stability. For more details, read my guide on how much a WordPress website costs.
3. A WordPress Website
WooCommerce works as a plugin inside WordPress. So, you need a working WordPress website before you can install it.
If you have not built your website yet, follow my guide on how to build a WordPress website for a small business.
4. Product Information
Prepare your product details before adding items to the store.
For each product, try to have:
- Product name.
- Clear product description.
- Price.
- Product images.
- Stock information.
- Product size, color, or other options, if needed.
- Shipping weight and dimensions, if relevant.
Good product information helps customers understand what they are buying. It also makes your store easier to manage.
5. Business and Payment Information
You may need business details to open a payment account. The exact requirements depend on your country and payment provider.
Before setting up payments, check which payment services support your business location. Also, prepare any required business, bank, and identity details.
Once these items are ready, you can start building your store.
How to Set Up a WooCommerce Store Step by Step
Follow these steps to create the basic structure of your online store.
Step 1: Install and Activate WooCommerce
First, log in to your WordPress dashboard.
Then follow these steps:
- Go to Plugins → Add New Plugin.
- Search for WooCommerce.
- Find the official WooCommerce plugin.
- Click Install Now.
- After installation, click Activate.
WooCommerce will now be active on your website.
You may see a setup guide after activation. It helps you enter some basic store details. You can follow it to get started.
Step 2: Complete the Basic Store Setup
The setup guide may ask for information about your store.
This can include:
- Store address.
- Country and region.
- Product types.
- Business details.
- Shipping and payment options.
Enter accurate information for your business. These details can affect shipping, taxes, and payment settings.
You do not need to enable every extra feature during the first setup. Start with the features your business actually needs.
For example, a small store selling physical products may only need product pages, a cart, checkout, payments, and shipping options at first.
Step 3: Configure Your Store Settings
Next, review the main WooCommerce settings.
Go to WooCommerce → Settings in your WordPress dashboard.
You will find different tabs for store settings.
General settings
Check your store address, selling locations, currency, and other basic options.
Choose the currency your customers will use. Also, set the locations where you plan to sell your products.
Products settings
Review your product-related options. These settings can control the shop page, measurements, reviews, and stock management.
Accounts and privacy
Decide whether customers can create accounts during checkout. You can also review your account and privacy options.
Emails
WooCommerce sends emails for events such as new orders, cancelled orders, and completed orders.
Check that your store emails use the correct business details. You should also test whether the emails reach your inbox.
Take your time with these settings. A small mistake can create confusion for customers later.
Step 4: Choose a Suitable WooCommerce Theme
Your theme controls much of your store’s appearance. It affects the layout of your pages, product listings, menus, and other design elements.
Choose a theme that works well with WooCommerce and supports the layout you need.
A good store theme should have:
- A clean and simple design.
- Mobile-friendly layouts.
- Easy navigation.
- Clear product pages.
- A readable font.
- Good loading performance.
Avoid choosing a theme only because it has many visual effects. A simple and useful design can make shopping easier.
If you need help choosing a theme, read my guide on how to choose a WordPress theme for a small business.
After choosing a theme, customize your logo, colors, fonts, header, footer, and page layout.
You can also use a page builder such as Elementor to design parts of your website. For a practical introduction, see my guide on how to build a WordPress website with Elementor.
Step 5: Add Products to Your Store
Products are the most important part of your online store. Customers need clear information before they decide to buy.
To add your first product:
- Go to Products → Add New.
- Enter the product name.
- Write a clear product description.
- Add the product price.
- Upload a product image.
- Set stock details if needed.
- Choose the product type.
- Select a product category.
- Publish the product.
WooCommerce supports several product types.
Simple products
Use this type for products without options or variations. For example, a basic notebook or a single kitchen item.
Variable products
Use this type when customers can choose options such as size or color. For example, a T-shirt available in several sizes.
Virtual products
These are products that customers do not need to receive by physical delivery. A service or online consultation can be set up as a virtual product.
Downloadable products
Use this type for digital files that customers can download after purchase. Examples include ebooks, templates, and digital guides.
Choose the product type that matches what you sell.
Write Helpful Product Descriptions
Do not rely only on product names and prices. Explain what the customer will receive and why the product may be useful.
A good product description should answer questions such as:
- What is the product?
- What problem does it solve?
- What are its main features?
- What size, material, or options are available?
- What should customers know before buying?
Use clear product images from different angles when possible. Also, make sure the images show the product accurately.
Step 6: Set Up Payment Methods
Customers need a way to pay for their orders. WooCommerce supports different payment options through built in features and payment extensions.
The available methods depend on your country and payment provider.
Common options include:
- Debit and credit card payments.
- Bank transfers.
- Cash on delivery.
- Other supported local payment services.
To review your payment options:
- Go to WooCommerce → Settings.
- Open the Payments tab.
- Review the available payment methods.
- Enable the methods your business supports.
- Open each method’s settings.
- Follow the provider’s instructions to connect your account.
For online card payments, you may need to create an account with a payment provider and complete its verification process.
Do not assume that every payment service works in every country. Check the provider’s supported countries, fees, and business requirements before choosing one.
Also, never enter your payment account password or secret keys into an untrusted plugin or website.
Step 7: Configure Shipping Options
If you sell physical products, you need to decide how customers will receive their orders.
WooCommerce lets you set shipping options based on shipping zones. A shipping zone is a location or group of locations where you offer a particular delivery method.
For example, you might offer one delivery rate for customers in your local area and a different rate for customers in other regions.
To set up shipping:
- Go to WooCommerce → Settings.
- Open the Shipping tab.
- Create a shipping zone.
- Add the locations covered by that zone.
- Add a shipping method.
- Set the shipping cost or other required details.
- Save your changes.
Common shipping methods include:
Flat rate
Charge a fixed delivery fee for an order or based on your chosen rules.
Free shipping
Offer free delivery when your store’s conditions are met. For example, you may offer it for orders above a certain amount.
Local pickup
Allow customers to collect their orders from your shop or another collection point.
Before launch, test your shipping rules with different delivery addresses. This helps you find problems before real customers place orders.
Step 8: Review Your Tax Settings
Tax rules depend on your business location, customer location, product type, and local laws.
WooCommerce provides tax settings, but you need to decide how they should work for your business.
First, check the tax rules that apply to your business. If you are unsure, speak with a qualified tax professional.
To review the settings:
- Go to WooCommerce → Settings.
- Open the General tab.
- Check whether tax options are enabled.
- If enabled, open the Tax tab.
- Review the available tax settings.
- Enter the correct rates and rules for your business.
Do not copy tax rates from another website without checking whether they apply to your business.
You should also test how taxes appear in the cart and checkout. Make sure the final order amount is clear to customers.
Step 9: Check Your Shop, Cart, and Checkout Pages
WooCommerce uses important pages to help customers shop and place orders.
These commonly include:
- Shop: Displays your products.
- Cart: Shows the items a customer wants to buy.
- Checkout: Collects customer and payment details.
- My Account: Gives customers access to their account and order information.
WooCommerce can create these pages during setup. However, you should still check that they exist and work correctly.
Go to WooCommerce → Settings → Advanced to review the page assignments.
If a required page is missing or assigned incorrectly, your customers may have trouble completing an order.
Open each page on the front end of your website. Check that the content loads, buttons work, and the layout is easy to use.
Step 10: Create Essential Store Pages
An online store needs more than product and checkout pages. Customers should also be able to learn about your business and understand your policies.
Consider creating these pages:
About Us
Explain who you are, what your business offers, and why customers may choose your store.
Contact Us
Provide a way for customers to ask questions. Include a contact form or suitable business contact details.
Privacy Policy
Explain how your website collects and uses customer information.
Terms and Conditions
Set out the rules that apply when customers use your website and buy from your store.
Shipping and Delivery Policy
Explain delivery areas, estimated delivery times, shipping costs, and other important details.
Returns and Refund Policy
Tell customers how they can request a return or refund and what conditions apply.
Keep these pages easy to find. Add links to the footer or other suitable areas of your website.
You can also review my small business website checklist to see what other important pages and features your website may need.
Step 11: Install Only the Plugins You Need
Plugins can add useful features to your WooCommerce store. However, installing too many plugins can make your website harder to manage.
Start with the features your store needs right now.
Depending on your business, you may need plugins for:
- Website backups.
- Security.
- Search engine optimization.
- Contact forms.
- Payment methods.
- Shipping services.
- Product filters.
- Email marketing.
- Performance improvements.
Before installing a plugin, check whether it is regularly updated and works with your WordPress and WooCommerce versions.
Read user reviews and check the support information as well.
Most importantly, avoid installing several plugins that do the same job. Keep your setup simple and remove plugins you no longer use.
Test Your WooCommerce Store Before Launch
Your store may look ready, but that does not mean every feature works correctly.
Testing is an important step before you invite customers to place real orders.
Use the following checklist to review your store.
Test the Shopping Process
- Open your shop page.
- Visit a product page.
- Select product options, if available.
- Add a product to the cart.
- Change the quantity.
- Remove an item from the cart.
- Continue to checkout.
- Check the order total.
Test Checkout and Payments
- Enter customer details.
- Try different delivery addresses.
- Check shipping costs.
- Review tax calculations.
- Test the available payment methods.
- Check the order confirmation page.
- Confirm that order emails arrive.
Use your payment provider’s test mode when available. Follow its instructions before testing real payments.
Test Your Website on Mobile
Many customers shop from phones and tablets. So, your store should work well on smaller screens.
Check that:
- Menus are easy to open.
- Product images display correctly.
- Product details are readable.
- Buttons are easy to tap.
- The cart works properly.
- Checkout fields fit the screen.
A store that works well on desktop but is difficult to use on mobile can lose potential orders.
Check Website Security and Backups
Before launch, make sure your website uses HTTPS and has a working backup plan.
Also, update WordPress, WooCommerce, your theme, and active plugins. Remove any unused plugins or themes that you do not need.
After launch, keep checking your website. Regular updates and backups help you manage problems before they become serious.
For a more detailed maintenance routine, read my WordPress website maintenance checklist.
Common Mistakes to Avoid When Setting Up a WooCommerce Store
A new store does not need every advanced feature from day one. However, a few common mistakes can create problems for customers and store owners.
Here are some issues to watch for.
1. Choosing a Theme Only for Its Design
A theme may look impressive in a demo but still be difficult to use.
Choose a theme based on product layout, mobile usability, speed, and WooCommerce support. A clear shopping experience is more useful than unnecessary design effects.
2. Using Poor Product Images
Customers cannot touch or inspect products online. As a result, product images play an important role in their buying decisions.
Use clear, relevant images. Avoid blurry photos and images that do not show the actual product.
3. Leaving Shipping Rules Unchecked
Incorrect shipping settings can show the wrong delivery cost or prevent customers from completing checkout.
Test different locations before launch. Make sure your delivery rules match the areas where you actually offer shipping.
4. Ignoring the Checkout Experience
A confusing checkout can make customers leave before placing an order.
Keep the process simple. Remove unnecessary fields where possible, explain payment options, and make the final order cost easy to understand.
5. Installing Too Many Plugins
Every plugin adds another part to manage. Some plugins may also affect website speed or conflict with other tools.
Install only what your store needs. Review your plugins from time to time and remove those that are no longer useful.
6. Forgetting Website Maintenance
Launching your store is not the end of the work.
WordPress, WooCommerce, themes, and plugins need regular attention. You should also check backups, security, and store functions over time.
How Much Does It Cost to Set Up a WooCommerce Store?
WooCommerce itself is free to download and use. However, running an online store can involve several costs.
Your total cost depends on the size of your store, the features you need, and the services you choose.
Common costs include:
| Cost item | What it covers |
|---|---|
| Domain name | Your store’s web address |
| Web hosting | Space and resources for your website |
| WordPress theme | Store design and layout |
| Premium plugins | Extra store features, if needed |
| Payment processing | Fees charged by your payment provider |
| Shipping services | Delivery and shipping costs |
| Website development | Professional setup, design, or customization |
| Maintenance | Updates, backups, and ongoing support |
You do not need to buy every premium tool when starting out. Begin with the features your business needs and add more as your store grows.
For a better understanding of website expenses, see my guide on WordPress website costs.
WooCommerce Store Launch Checklist
Before making your store public, use this quick checklist.
- Domain and hosting are working.
- WordPress and WooCommerce are installed.
- Store details and currency are correct.
- A suitable WooCommerce theme is active.
- Product names, descriptions, prices, and images are ready.
- Payment methods are configured.
- Shipping zones and delivery costs are checked.
- Tax settings have been reviewed.
- Shop, Cart, Checkout, and My Account pages work.
- About, Contact, Privacy, and store policy pages are published.
- Test orders have been completed.
- Order emails are working.
- The store works on mobile devices.
- HTTPS and backups are in place.
- Unused plugins and themes have been removed.
Once these checks are complete, your store will be in a better position to welcome customers.
Frequently Asked Questions About Setting Up a WooCommerce Store
Is WooCommerce free to use?
Yes. The main WooCommerce plugin is free and open-source. However, you still need a domain and hosting to run your WordPress website. You may also pay for premium themes, plugins, payment processing, or professional development.
Can a beginner set up a WooCommerce store?
Yes. Beginners can create a basic store by following the setup steps and using a suitable theme. However, payment setup, shipping rules, tax settings, and custom designs may need extra care.
Can I use WooCommerce without coding?
Yes. You can manage products, orders, payments, and many store settings from the WordPress dashboard without writing code.
For more advanced designs or custom features, you may need a developer or a suitable plugin.
Can I sell digital products with WooCommerce?
Yes. WooCommerce supports virtual and downloadable products. You can use these options to sell items such as ebooks, templates, files, and other digital products.
Does WooCommerce support online payments?
Yes. WooCommerce supports payment methods through its built-in options and payment extensions. The services available to you depend on your country and payment provider.
Is WooCommerce suitable for a small business?
Yes. WooCommerce can be a good choice for small businesses that want to sell products online and manage their store through WordPress.
It is flexible, but you still need to look after hosting, updates, security, and store maintenance.
Do I need a developer to build a WooCommerce store?
Not always. You can set up a basic store yourself if your needs are simple.
However, professional help can be useful when you need a custom design, advanced product options, payment integration, shipping rules, or a better checkout experience.
Final Thoughts
Setting up a WooCommerce store is easier when you break the work into smaller steps.
Start with a working WordPress website. Then install WooCommerce, add your products, configure payments and shipping, and create the pages your customers need.
Before launch, test the full shopping process on desktop and mobile. Check your payment methods, delivery costs, order emails, and checkout pages.
Remember that a successful online store needs more than a good design. It should be easy to use, clear about its policies, and simple to manage.
If you want to build a WooCommerce store but need help with the design, setup, or technical side, I can help.
Explore my Ecommerce Solutions with WooCommerce service to learn how I can help you build an online store that fits your business needs.